


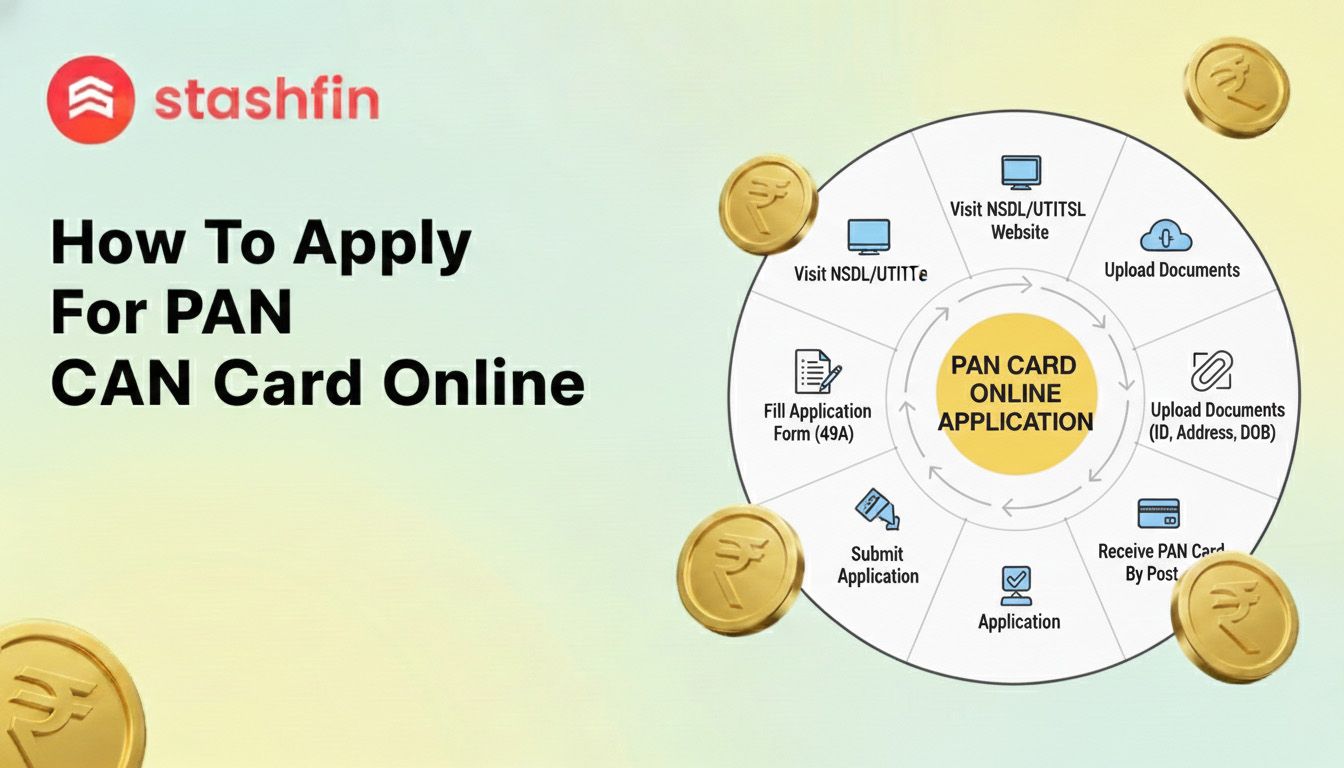
How to Apply for PAN Card Online: A Step-by-Step Guide
Need a PAN card for a new job, bank account, or to file taxes? The online PAN application can be finished in about 15 minutes from home. This guide shows you exactly how to apply for a PAN card online, without confusing jargon.


We’ve cut through the clutter to give you a clear, direct path to getting your application submitted successfully. Forget about hunting for the right forms or worrying about making a mistake; every step is laid out for you.
Before You Start: Your 3-Minute Preparation Checklist
Nothing is more frustrating than starting an online form only to realize you don't have everything you need. Taking three minutes to gather these items now will save you time and hassle. This quick checklist covers all the documents and information required for your PAN card application.
To make sure your application is smooth and interruption-free, have these four things ready:
- Your Aadhaar Card: You'll need this for your name, address, and date of birth.
- A Scanned Passport-Size Photo: A clear, recent digital copy of your photo.
- A Scanned Signature: Your signature written on a blank white paper, also saved as a digital file.
- A Way to Pay Online: A debit card, credit card, or a UPI app (like Google Pay or PhonePe).
Note: For the photo and signature files, government websites have strict size limits (under 50 KB). If your files are too large, use a free "online image resizer" tool to shrink them. The total online PAN card application fee is approximately ₹107, which you’ll pay at the very last step. Once you have these items, you're all set.
Where to Apply: Choosing the Right Official Website
Now that you have your documents ready, the first step is visiting the correct online application website. When you search for "online PAN application," you might notice two names pop up: NSDL (now called Protean) and UTIITSL. The government has authorized both companies to process PAN card applications, so both websites are equally safe, official, and reliable.
For a new application, there’s virtually no difference between NSDL and UTIITSL. Think of them as two official, trusted couriers that deliver your application to the same Income Tax Department. The fees, processing time, and steps are nearly identical. You don't need to worry about picking the "wrong" one.
This guide uses the Protean (NSDL) pan card official website, as it is a popular and straightforward choice. Click the link below to open the secure application page in a new window.
(Link to Official Protean PAN Application Website)
Step 1: Filling Out Your Basic Details on the Form
Once you're on the official application website, you'll see a short form.
- For "Application Type," select New PAN - Indian Citizen (Form 49A) from the dropdown menu.
- In the "Category" field, choose Individual. These selections tell the system you are applying for your first personal PAN card.
The next section asks for your basic details like your name, date of birth, email, and mobile number. The single most important tip is to enter your name exactly as it appears on your Aadhaar card. Even a small difference, like a missing middle name or a different spelling, is the most common reason applications get delayed or rejected.
After you submit these initial details, the website will generate a Token Number. This number is a temporary password or a "save point" for your application. Immediately copy this number and paste it into a notepad or take a photo of the screen. If you get disconnected, this number will let you continue where you left off.
With your basic information saved, click "Continue with PAN Application Form."
Step 2: Handling the Tricky "AO Code" in 60 Seconds
On the main application page, you'll find a section asking for an "AO Code." This is an internal code used by the Income Tax Department to identify your local tax office. You do not need to know this code beforehand; the website has a built-in tool to find it.
To get your AO Code, look for a set of buttons below the empty boxes and select "Indian Citizen." A small window will open asking for your location details. Just follow these steps:
- Select your State (like 'Delhi' or 'Tamil Nadu') from the first dropdown menu.
- Next, select your City (like 'New Delhi' or 'Chennai') from the second menu.
- The website will then show a list of office details and their codes. Click the circle next to the one that matches your area, and the system will automatically fill in the AO Code on your main form.
Step 3: Uploading Your Documents the Easy Way (e-KYC)
After filling in your details, you’ll reach the document submission page. You can skip scanning and uploading by choosing the first and most popular option: Submit digitally through e-KYC & e-Sign. This is the secret to getting an instant PAN card through Aadhaar with minimal fuss.
Choosing the e-KYC option gives the PAN website permission to securely access your details from your Aadhaar card. It will automatically pull your photo, name, address, and date of birth from the government's Aadhaar database. The photo on your PAN card will be the same one that is on your Aadhaar, which removes the need to upload any documents yourself.
To finalize your application, you'll use an "e-Sign." This works like the OTPs you use for banking. You will be prompted to enter your Aadhaar number, and a secure, one-time password will be sent to the mobile number linked to it. Simply enter that code to digitally "sign" your form. This is why having your PAN card and Aadhaar linked is now standard practice for a seamless process.
Step 4: Making the Payment and Getting Your Acknowledgment
The final step is to pay the small processing fee. The online PAN card application fees are set by the government, and you can use common methods like UPI (Google Pay, PhonePe), debit/credit card, or net banking.
Once your payment is successful, you will be taken to the Acknowledgment Slip page. This slip contains your Acknowledgment Number, a unique 15-digit code. Think of this number as a tracking ID for your application. It is the only thing you will need for PAN card application status tracking.
Before you do anything else, save this slip. Look for a "Download PDF" button or take a screenshot of the entire page. This slip is your official proof of application.
What Happens Next? Tracking Your PAN Card Application
With your Acknowledgment Number, you can check your application's progress. Visit the same official website where you applied and look for a link like "Track PAN Status" or "Know Status of Your Application." Enter your 15-digit Acknowledgment Number, and the site will show you where your application is in the verification process. It’s a good idea to check this after a couple of days.
You will receive two versions of your PAN card:
- e-PAN: A secure digital copy sent to your email address, usually within 2-3 days. This official PDF document is password-protected (your date of birth is the password) and is valid for most immediate needs.
- Physical PAN Card: This laminated card will be printed and sent to the address from your application form. It typically arrives by post within 1 to 2 weeks after approval.
What If Your PAN Application is Rejected? (And How to Avoid It)
If a PAN card application is rejected, it’s almost always for a simple, preventable reason. You won’t lose your money or be banned from applying again; it just means a small correction is needed.
Common Reasons for Rejection:
- Name or Date of Birth Mismatch: The details you enter must be an exact match to what’s on your Aadhaar card.
- Unclear Photo or Signature: If you uploaded your own files, make sure they are clear and follow size guidelines.
- Incomplete Information: Every box with a star (*) next to it is mandatory.
By far, the number one issue is a data mismatch. The government’s system automatically compares the details you typed with the information on your Aadhaar. If there's even a tiny difference, the system rejects it for security reasons. When you fill pan card form 49A online, always have your Aadhaar card in front of you and copy your details exactly.
Quick Answers: Your Top PAN Card Questions
- Minors: A PAN card application for minors is a common need for investments. A parent or legal guardian must apply on the child's behalf as a "Representative Assessee."
- NRIs: Non-Resident Indians and foreign citizens must use Form 49AA instead of Form 49A.
- Corrections: If you already have a PAN card but it has a mistake, use the "Change/Correction in PAN Data" option. You should never apply for a second PAN card.
Your New PAN Card and What You Can Do With It
You now know exactly how to apply for a PAN card online. This accomplishment isn't just about getting an ID; it's about unlocking your financial independence. The benefits are immediate:
- Open a new bank account.
- Accept a job offer and get your salary processed.
- Start investing in mutual funds.
- File your income tax returns.
See this new PAN card not as a requirement you had to meet, but as the key that opens the door to your financial goals. You’ve proven you can navigate these important processes, and this is just one of many milestones you can now confidently achieve.
Check out the instant personal loan app by Stashfin on Android and Stashfin iOS app for quick approvals and easy access to funds.